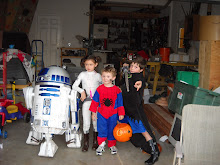
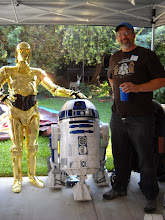
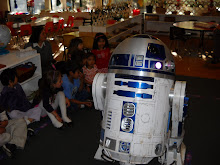
The Bay Area R2 Builders are headed to Wonder Con in San Francisco at the Moscone Center tomorrow. We've got a panel discussion on Sunday at 12:30 in room 220. Please come by and see us. We'll also be roaming the convention. The San Francisco Chronicle wrote up a story about us and the convention here:
R2-D2 Makers an attraction at Wonder Con in S.F.
I'll post pictures soon.
Friday, April 1, 2011

Tuesday, December 14, 2010
Gauntlet progress
Once I got the curved pieces formed for the gauntlets, I went to work building up the rest. Here's where I am with the left one at the moment:


This is a little rough to look at now, but it's all coming together. I'm going to have to mess around with the underside by reshaping it. I also think I'll take the inside layer out and add some thin styrene to make it less bulky. All these little pieces were cut and glued together with PVC glue. Once I cut out the templates and taped them together into a 3-D model, I could see what the overall shape and relationships were. That made cutting and building decisions a lot easier. It looks like the right gauntlet will be a bit easier. And after these, the armor should be a lot easier.
Monday, November 22, 2010
Boba Fett 2 Gauntlets
I took some time over the weekend to make up some forms for shaping the pvc expanded cell board for the gauntlet base pieces. There are curved pieces that wrap over the top and bottom of the forearm that have a bunch of stuff attached on top. Wizard of Flight has some curve guides for them. I transfered the curves onto some pieces of plywood, cut them out, mounted them, and then wrapped them with some card stock.


Then I cut out some pieces of board slightly oversize to the plans. When you heat this stuff up, it tends to get some irregularities and curving at the edges. So I figure I'll get the curve in there and then cut them to size, square them up on the belt sander, and clean them up. That way I can be sure to cut the piece from the section that has the right curve. I got a big pot of water to a full boil, then I dropped the pieces in one at a time. It only takes 30 seconds or a minute for them to get floppy. Then with some gloves, I put the pieces over the form and shape them down to fit. As soon as it cools, it holds the shape:


Cool, huh? Don't worry. These are oversized on purpose, and they are supposed to have some slightly different shapes for the assemblies that attach on top.
I got to thinking about these after I made them. These are 1/8" thick. There's another piece that double over the tops of these with some cut outs. So that'll be 1'4" thick total. That's too thick and cumbersome, I think. So I found some 3/32" thick stock in my pile in the garage. As soon as I have time, I'll redo this in the thinner stuff. Eventually these will be painted and weathered to look like they are metal underneath.
Thursday, November 11, 2010
Boba Fett 1
So I've been scheming about building up the full Boba Fett costume for a long time. I actually started in earnest on it before Halloween. I tracked down a Sgt. Fang helmet. I'll post more about that later. The particular pull from the mold that I got from him has a lot of problems and will need a lot of work to make it right. I'm pretty disappointed after all the raving about Sgt. Fang and the Mystery Helmet on The Dented Helmet. But for now, I've been gearing up to work on the jetpack, the gauntlets and the other hard goods. Jetpack first:
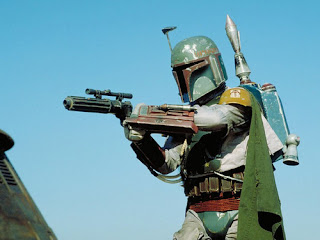 Scratch built Boba Fett has to start with the great set of drawings that Wizard of Flight has made available on The Dented Helmet. Look for the sticky note links under the forums for the different parts of the costumes.
I downloaded all the plans and spent a while playing around with the pdf printing variables to get them the right size. WoF drew the jetpack at 15" wide. At the time, I think that was his best estimate of the actual width of the jetpack from lots of reference pictures (also posted on The Dented Helmet in the galleries.) I've decided to scale the jetpack up a bit to about 16.25" Two reasons: 1. I'm a taller guy (6'2") than the Boba Fett actor, and 2. some new pictures and some careful sizing makes it look like the real thing is bigger than 15". Even WoF seems to agree now, but he hasn't changed the official drawings yet.
Another challenge is getting the pipes that serve as the rocket thrusters and tanks the right size. To keep the project cheap and light, scratch builders go with plumbing supply PVC pipe. So I'm using 2.5" inside diameter pipe for the outside tanks and 4" I.D. pipe for the main tank. These are both really close to the sizes on the originals as far as I can tell although WoF has the middle tank a good bit smaller. So using readily available pipes requires tweaking the plans some more. Here's where I am now. I've got a number of the main pieces cut and fitting together with screws:


I downloaded all the plans and spent a while playing around with the pdf printing variables to get them the right size. WoF drew the jetpack at 15" wide. At the time, I think that was his best estimate of the actual width of the jetpack from lots of reference pictures (also posted on The Dented Helmet in the galleries.) I've decided to scale the jetpack up a bit to about 16.25" Two reasons: 1. I'm a taller guy (6'2") than the Boba Fett actor, and 2. some new pictures and some careful sizing makes it look like the real thing is bigger than 15". Even WoF seems to agree now, but he hasn't changed the official drawings yet.
Another challenge is getting the pipes that serve as the rocket thrusters and tanks the right size. To keep the project cheap and light, scratch builders go with plumbing supply PVC pipe. So I'm using 2.5" inside diameter pipe for the outside tanks and 4" I.D. pipe for the main tank. These are both really close to the sizes on the originals as far as I can tell although WoF has the middle tank a good bit smaller. So using readily available pipes requires tweaking the plans some more. Here's where I am now. I've got a number of the main pieces cut and fitting together with screws:


I went to Interstate Plastics in Sacramento and bought some expanded cell PVC foam board. This is the Sintra (trade name) that guys are talking about on the boards. A sheet of 4' x 8' .25" board is about $50. I also got a lot of 1/8" pieces for a great piece out of their scraps bin. I can't say enough good things about this stuff. I used a lot of in on the R2. It cuts easily, the edges clean up, it can be painted. It's lightweight and easy to work with. You can heat it up, bend it, and it will hold the shape. You can glue it and create really strong joints with standard plumbing pipe PVC cement. It's just about the ideal material for prop building. I got enough to build several jetpacks and the gauntlets.
The back of the jetpack or inside curves across both the X and Y axis. So I used a thinner piece (1/8") there and I've just temporarily screwed it together for fitting:

WoF's plans appear to be different from the real thing at the bottom here. On the screen used jetpack there's a recessed box. I'll be mocking that up and adding it. It'll be more detail and work, but not difficult. Once I've got all the modifications on these basic pieces sorted out, I'll be gluing all of these up. That'll add a lot of strength and integrity to the whole thing. The goal is to have it be tough, durable, but lightweight. I'm also going to cut some big pieces out of the pipes where they are hidden under the pack housing. That'll shave some more weight off. More soon.
Sunday, October 31, 2010
Halloween 2010
Built a lot of props for Halloween this year, including a Road Warrior costume.


I used a set of football pads off of Ebay, added some spikes from some Goth Halloween store accessories. The crossbow is a cheap pistol version that I sawed off and mounted to a shin guard. I also got a set of catcher shin guards, modified them, added mounts for crossbow bolts. I made arm and elbow guards from shin guards. I used a handful of leather belts got cheap from a second hand store for straps. The torso armor is a rubber walkway carpet protector from Home Depot. The rabbit skins came from the Internet. I added some fake bones and teeth, painted to weather them, from the Halloween store. Then there's the mohawk with some temporary red dye. A black feather boa worked for the trim around the neck of the football pads. I painted everything flat black and weathered it with brown and grey acrylic paints, watered down heavily. The boots are some SWAT boots I already had. And I got a military issue gasmask at a Halloween store, painted the filter bright red. I also modified some old filters on my paint and fume mask and wore that. And I had a pair of industrial looking goggles that went over my glasses.
I put together several other things for the Harrison's Halloween party and for our house. Today I had a bit of time and I threw together a rough Gonk Droid from stuff I had in the garage. Another day of work on it and some paint and I think it will look pretty good:

There are two 18 gallon tubs, a 9" baking pan, several scrounged parts screwed into the pan, and some simple 2x4 legs and feet with dryer vent hose over the posts. This needs a lot more work but it was a good quick start on the project.

I should also mention that I recently did a little event at a local Gamestop when The Force Unleashed II came out.

Tuesday, October 5, 2010
Update on Hammer and Obelisk
I managed to get these both painted and weathered. Both are coming along nicely and will be ready for the Halloween party. I'm pretty sure that I'll need to whomp some kids with the hammer before that.
 I've put a piece of real oak laminate that I had in the shop around a piece of 2.5" pvc pipe. I tried a smaller pipe that gripped better but it was too out of scale with the hammer head. I'll be putting some faux metal straps around the body of the head, and some metal caps and bands on teh handle.
I bought some leather straps and I was going to wrap the handle, but this wood grain looks so good on its own I might leave it. Notice the little spikes on the top. Maybe they need to be bigger, and I probably need a pair on the bottom too.
 I got this all screwed together and I got the wonky top adjusted and attached. Then I hit the whole thing briefly with the orbital sander to clean up the seams. I put some filler into the screw holes and dings. Then I primed it with some latex primer I had laying around. Then a coat of gray, and two coats of weathering--watered down black acrylic and watered down burnt umber. But I don't love the finished look. It may need to be a different base color like a sandy desert tan, and then weathering over that.
I have been toying with the idea of etching some heiroglyphics on two sides in a column and then cutting them out. Then I could put a light inside to illuminate them from inside out. That would look cool, but I don't know if I"ll have time to do it. Otherwise, I think Alex and Candace may just paint some glyphs onto it.

I bought some leather straps and I was going to wrap the handle, but this wood grain looks so good on its own I might leave it. Notice the little spikes on the top. Maybe they need to be bigger, and I probably need a pair on the bottom too.

I have been toying with the idea of etching some heiroglyphics on two sides in a column and then cutting them out. Then I could put a light inside to illuminate them from inside out. That would look cool, but I don't know if I"ll have time to do it. Otherwise, I think Alex and Candace may just paint some glyphs onto it.
Sunday, October 3, 2010
Sac Sci Fi Con 2010
Took R2D2 to the Sacramento Sci Fi/Horror Convention a couple of weekends ago. Website here. Made the rounds, saw a lot of 501st members, some Mandalorians, and others. Ed Wamser was there with his R2D2 too.


Sam's getting over his trepidations about The Empire. Thanks to Myke Soler for being so friendly.


Sam's getting over his trepidations about The Empire. Thanks to Myke Soler for being so friendly.

Subscribe to:
Posts (Atom)