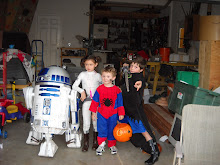
I've had the whole droid put together for a few days now. There are several little things to take care of, but for now it's great to see the results of all those months of work. I figure that it took me a year to get from zero to here. Now I'm researching and gathering parts for the lights, sound, and drive systems.
Sunday, August 30, 2009
Thursday, August 27, 2009
Painting Parts with Blue and Silver/Aluminum
Jamie McShan and I were talking about painting on email and I realized that this would be a good blog post. Jamie's blog. By the way, his MDF horseshoe ideas and his periscope lifter are brilliant. Check out his work.
The topic: painting parts with both blue and silver. That would be the booster covers, the ankle details, the octagon ports, the power coupler ports, the radar eye, the side body panels, and the coin slots. Here’s the rough summary of what I’ve done so far.
When I built them, I attached the ankle cylinders and the ankle holders together before I put them on the droid. Then I painted them as a unit. I primed the unit, then I masked off the blue sections to paint the silver and then masked the silver to paint the blue. That worked out well.
I haven't painted the interior silver details on the Radar Eye yet, and I'm not sure if I'm going to. At this point, I don't think even the best quality job I could do on that would look better than just leaving it alone, if you know what I mean. Getting smooth, even silver paint in there is too tricky.
On the octagon ports, I found a clever solution suggested by someone on the groups. Mine are resin. So I took them and carefully sanded the backs off of them on my big stationary belt sander. I sanded them down just until the back was off and up to the bottom edge of the recessed details inside. Look into the octagon ports and you'll see what I mean. Once that was off, I painted the whole port silver. Then I made up some pieces of styrene to fit on the back and I painted those R2 Blue. Then I just glued that back plate back on and I had perfect blue and silver lines on the details. The problem here is that I have since figured out that the sidewalls of the octagon ports are also blue. I don't like the way that looks, but it's clear in the movie pictures. I've already installed my ports, but I think the way to deal with this would be to cut the back off of the port altogether right where the sidewall meets the backwall, and then paint them separately. Don't know how that would work with the sanding trick too. That's one of the details I'll get back to later. I wanted a good tight fit on my ports, so I glued them all in, and now I can't take them out easily.
On the power coupler ports, it's a different matter. I originally painted them all silver, then I used a paint brush to put blue (from the spray can) onto the raised triangle details inside. The spray paint isn't made for this, obviously, and it gummed up on my and didn't come out very well. The color and coat on those triangles is uneven. I think I'll go back to that and do some very careful surgical masking and try to paint them again. But masking like that with tape doesn't work in tight details. Some always seeps under the edge and you don't get clean lines, with one exception:
Side body port panels. These are all silver and blue too. I think that some people are making as single blue backing plate and then painting these before they are assembled. That's a good workable solution. I built my body ports (the ones with the vertical recessed slots), painted them silver, and then I masked off the fronts of them. I covered them with tape and then used an xacto with a sharp new blade to carefully remove the tape over the recesses where blue paint needs to get in. Then I painted them blue. I did a couple of pretty light coats, hitting them from an angle so that the blue paint could get down in there. Then I removed the masking almost immediately to get clean lines. That worked well and I got good results.
On the coin slots I painted them silver first, then I carefully masked off the front faces of the 6 little units. Then I painted the rest blue. That came out pretty well.
The ankle details were tricky. Getting a clean line between blue and silver on those tabs on top was hard. I painted them one color, then masked and painted the other color. Then I think I did a bit of touch up with a paint brush. Close inspection of all of these would reveal my crappy work, but from anything over 5 feet away, it's not visible.
I haven’t done the booster covers yet, but I think the best way to do the recessed silver pockets will be to mask off the blue now that they’ve been painted and cured, and then cut out the masking tape over the slots with a sharp xacto knife and paint the pockets silver with spray paint. I’ve been using Rustoleum Metallic Silver, by the way. It seems to have the most aluminum looking results in my tests.
So I guess the lessons I learned were: 1. figure out the best order to paint in--either silver first then blue, or vice versa, depending on the nature of the details, the curves, angles and features. 2. Paint the first color carefully --see all the lessons I learned about painting on the blog. Let it dry thoroughly. 3. spend some time carefully masking off the first coat as prep for the next color. 4. Paint the second color, remove masking soon to prevent paint damage, sticking, and to get clean lines. 5. Where possible, cut or take apart the pieces along blue/silver lines for separate painting.
Sunday, August 23, 2009
Putting Domes together
The biggest challenge with the R and J dome I got has been getting the inner dome that's too small to fit snugly with the outer dome. Earlier I had cut the inner dome into two pieces to introduce a bit more diameter into it:
That solved the problem for the bottom half, but the top half was still fitting poorly. In the end I made another cut up most of the way of this smaller dish piece and bent the whole thing out a bit to add diameter. Then when I still couldn't get pressure on the two dome for gluing, I drilled several holes under where the pie panels would cover. These could be hidden, and I expect I may want to add a radar sensor or a periscope later, so it wasn't a problem to cut them, although my nerves were shot from all the important and potentially disastrous cuts. But the holes made it possible for me to do this:
I traced out the outline of the outer dome onto the inner dome, keeping the placement for the pie panel holoprojector carefully in mind, and put glue on the inner dome and then clamped the whole thing together. Makes him look like some post-apocalyptic mad scientist or something.
Even all of this work didn't get me a clean tight fit between the domes all the way around. But I didn't see how I could improve on it. And once I started laying the pie panels in there, the gaps weren't evident. So I had to just stop myself from putting too much work into something for diminishing returns and I moved on.
Once that inner piece was in, I could put the painted pie panels in and glue them.
It was very cool to see these go in.
BTW, this:
is the handiest tool on my workbench lately. I put a couple of rounds of duct tape around the lip so that it wouldn't scratch the dome and it's perfect for holding it while I work on it, upside down or right side up. I keep thinking about the Mike Senna videos where he puts all of his tools down on the ground to work with them and has to bend over or get on his knees to do anything. If you make your working body positions comfortable and ergonomic, you'll enjoy the work much more and you'll do much better work. Getting your eyes and hands straight and square to the work piece is always important too, like when I glued these pie panels down for good.
Friday, August 21, 2009
Final painting on dome
I masked off the dome today leaving only the little section around the rear PSI that is supposed to be blue. On the front PSI, there is a cut out, outer dome piece that mounts over the hole, but on the rear one, it's the inner dome itself that is painted inside the picture frame piece of outer dome. Someone called this the "perfect circle" because you have to cut this one yourself and it has to be done exactly right--no help with the laser cutter on it. I think I used a slightly smaller hole saw and then rounded it out with a file. I have been surprised at how workable aluminum is on the project--I didn't think the perfect circle was that hard to create, or at least to get it perfect enough to suit my eye.
I also masked off the top ring of the dome mounting ring because it needs to be blue. I came up with a little trick here. I didn't want to get blue paint down in the groove between the rings, but just hanging tape over the edge wasn't going to seal it up enough. So I got some plumber's tape off my bench--the super thin white stuff that you put on threads for pipe fittings--and I wound that around the dome ring a few times pulling it tightly until it filled up the groove. Then I taped it off so that the tape just overlapped the plumber's tape. That way the plumber's tape would keep paint out of the groove. And the blue would have an edge right at the lip of the groove. The tricked worked well to keep paint out. Here's the ring primer with self-etching primer. I also sanded both sections down to 400 grit or more.
After the primer dried on these pieces, I gave them both a light coat of cobalt metallic blue, let that dry for an hour or so, then I put a medium wet second coat on. After ten minutes I layered on the blue anodized. They came out pretty well although I got a scuff on the ring and had to go back and feather it in and paint a bit of touch up. The scuff seemed to just be into the blue anodized layers. So I let it dry for a day or two, then I very lightly and carefully used some 400 grit on it to feather the edges down and try to get it to blend in. Then I hit it with a couple more coats of blue anodized. That made the blue anod. heavy and less of the metal flake came through, but overall I think the results are good.
Saturday, August 15, 2009
Attaching Dome Panels--Bolts instead of glue
I started attaching the blue panels to the dome today. I used my method from the foot strips. I cut some 1/2" pieces of 3/16" threaded rod (I think), and some pieces off of some machine screws. I used the old carpenters trick on the inside of the panels to find the center. Draw two diagonal lines connecting the corners, the intersection (for squares and rectangles) is the center. But these are funky curved trapezoids. So the X marks a spot that is centered left to right, but not top to bottom. That's ok, because I marked the X for the hole on the dome the same way. Be sure to scuff up the panel before you glue to get good adhesion. Make an X by drawing diagonals across the pie panel or dome panel too and drill a slightly over sized hole (for adjustments to center the panel):
Trim off the snags from the hole with an Xacto or sand paper. I put a small dollop of gel superglue on the panel X, carefully placed the threaded rod into it, and tried to leave the hell alone for a while to set up.
Disclaimer: I am quite pessimistic that this method will work in the end. It's got two problems: 1. The gluing of the rod onto the panel is a really weak joint. I doubt that it will be able to withstand any pressure from the tightened nut on the inside of the dome. I'm going to let this cure over night and see. 2. Since there's just one post here, the panel will no doubt slide or rotate out of position is the nut isn't tight. That'll look like crap. Maybe if the glue holds, I'll put another tiny drop of glue on the panel to lock it into position. Then I'd be able to get them off if I choose.
I'm just worried to commit at this point and secure these panels permanently with tape or glue or JB Weld. I know that I'll want to separate the domes at some point when I start adding electronics, and I'm not sure which if any other components like life form sensors or periscopes I'll be adding. But maybe this will work. Here's the result of all the panels bolted in from the inside:
And finally, since I couldn't stand to not put some it together today and because there are no pictures of me with the droid on here:
I shouldn't be doing it at this point, but I keep walking through the shop while I'm doing something else and the droid catches my eye, and I think "Holy shit, there's an R2D2 in here! How cool is that?"
Paint Success, Finally
I finally had some good fortune with the blue paint project. With the legs and body, I have been struggling to get good results on the so-called Krider Blue method--primer, Rustoleum Cobalt Metallic Blue or Deep Metallic Purple, Blue Anodized, and Clear Coat, in that order. All of these paints have pretty different properties when you apply it. The primer is forgiving, but the rest have all screwed up on me in one form or another, and the temperature and humidity are other variables that make the process unstable and unpredictable.
I've been prepping all of the dome pieces for painting for several days now. And when I painted them yesterday, I finally got some good, deep luster results, I think. At least the results are good for me. These pictures don't really show it, but the blue anodized layered on top of the cobalt metallic worked out well--the color is a deep vibrant blue. The theory is that you put your last coat of metallic on and then wait ten minutes to put on the blue anodized. The blue anodized is supposed to mix with the metallic and make the coat deep and reflective. Mine's pretty good for me.
Here's some lessons I think I've learned so far:
1) Read the labels on the paints. Some of these can be recoated immediately, some within 30 minutes, some within an hour, and others only after 24 hours. I take it that there are different curing times for the chemical formulas.
2) I'm impatient and want good results. I have to consciously make a plan for the coats and then discipline myself to stay to it without messing with the order, dry times, or parts.
3) The ten minute period between metallic and anodized is a rough number. When it's hot, I did it sooner--5-8 minutes. And I used a kitchen timer to really get this close.
4) The blue anodized (can't remember the brand--I got it at Kragen) is peculiar stuff. It goes on very thin and the nozzle clogs easily so it was hard to get a good even coat with it, and you can't really see when you have because it's kind of clear. I scraped the nozzle hole clean mid coat yesterday and kept shaking the stuff and managed to start getting an even coat.
5) The balance between too much and too little for a coat is really tricky for me. With the blue anodized the coat was looking grainy. I waited 15 or 20 minutes at one point and then put another coat on that started going on wetter and more even. That's when the coats seemed to merge and starting looking like I thought they should.
6) The aluminum parts have to be primed with self-etching primer from the auto parts store. This stuff eats away at the surface a bit and gets a good bond. I put on a few thin coats of this with lots of sanding to 400 grit before, and then light sanding with 400 between coats to get it smooth. Seems to have worked. I could still see some spin grooves on the pieces after the 400, but I knew the paint would cover it.
7) Temperature ranges for the paints are 60-90 or so. I tried to follow that. It's August so I did some painting early in the morning when it was cool and there was no wind. I don't think I got any good results when I painted when it was hotter than 85, except maybe with the primers.
8) Clear coats, as I have said before, just suck. I had several very good paint jobs with a lot of work in them just wrecked by trying to clear coat them. It would run or lay on all grainy or something. Made me want kick someone's ass at Rustoleum. No clear coat for anything on my droid now.
9) I set up a semi enclosed painting booth just outside my shop. I tacked up tarps to contain overspray and set up a table with an old lazy susan to put pieces on for spraying. That seems to have worked well, but if there's a breeze dust always gets in the finish. I tried to take the pieces into the shop after they started to flash off and then leave everything undisturbed until the coat set. The blue anodized says that it'll take 7 days for the coat to fully cure. It's been a day and a half now. If I had more patience, I'd leave them alone entirely for a week, but I'm too eager to see the dome come together.
10) Painting sucks.
I've been mounting some dome pieces today. Pictures and a report on that shortly.
Friday, August 14, 2009
Cock-Eyed
An issue: where the hell do you mount the radar eye on the R2? It's not in any of the club blueprints. I checked around and here's the deal. The radar eye actually moves around a lot from movie to movie. It's actually crooked in several important shots in several of the movies. I saw this the other night while watching ESB or ROTJ and I nearly snarfed my drink. I thought it must have been just a trick of the lighting. But no, it's mounted crooked. After working so hard to get everything else straight and true on this project, this discovery really bugged me for several days. But there it was in lots of the reference pictures and movie stills. It also appears that the eye moves up a down a bit across different models of R2. More or less the bottom right and bottom left corners of the eye line up with the right and left corners of the cutouts it sits over, and it looks to be about 3/8" to 1/2" above them. After looking at a lot of movie stills, I also came to suspect that something's off with the club blueprints somehow. The radar eye in several clear movie shots is bigger in proportion to the stuff around it than the one in our club's plans. The right bottom corners of it extend way over almost to the holoprojector hole to the right. But I'm not complaining about the plans. Given the job of trying to codify the measurements of R2 from so many sources and mostly from pictures, the guys in the club have done a great job. In the end, I got over my OCD issues about having things straight and square when I build stuff (I also have a real fetish for good rulers and micrometers), and I mounted that thing crooked:
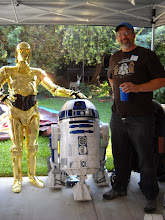
The little bump on the lower left is where one of my mounting posts on the back of the radar eye is kind of poking up. That's since been carefully sanded down flush. I reserve the right to go back and remount the eye straight later, but for now, I'll let the movie shots be my guide.
How did I mount it?
At first I thought I would use these hanger screws that have a wide thread lag screw on one side and a machine bolt on the other.
But after messing around with these and trying to get them the right length and screwed into the back of my resin radar eye, I changed the plan. I know from rock climbing that the pull out strength on a piece of threaded rod with a good adhesive can be very high--they used to use glue in bolts on routes for clipping. So I cut some 1/2" pieces of threaded rod (maybe 3/16" in diameter) and glued them into the holes I had made in the back of the radar eye with gel super glue. Once those set up, they were bomber. All that surface area with the threads and the glue filling the hole makes a great bond.
Going backwards: how did I locate the holes? When I figured out where I wanted the eye to hang on the dome, I traced it into place with a pencil. Then I figured out where the four screws should go. Then I drilled the dome first. Hold the radar eye back on the dome carefully lined up with the outlined location and you can mark the hole from the inside of the dome with a pencil. That way you get perfect alignment on a tricky placement. Here's the radar eye and the bolts from the inside:
It's just not possible to get the angle of the mounting posts exactly right and the curves make things difficult. So just use a larger bit for these holes through the domes and use a washer on the nuts on the back.
The little bump on the lower left is where one of my mounting posts on the back of the radar eye is kind of poking up. That's since been carefully sanded down flush. I reserve the right to go back and remount the eye straight later, but for now, I'll let the movie shots be my guide.
How did I mount it?
At first I thought I would use these hanger screws that have a wide thread lag screw on one side and a machine bolt on the other.
But after messing around with these and trying to get them the right length and screwed into the back of my resin radar eye, I changed the plan. I know from rock climbing that the pull out strength on a piece of threaded rod with a good adhesive can be very high--they used to use glue in bolts on routes for clipping. So I cut some 1/2" pieces of threaded rod (maybe 3/16" in diameter) and glued them into the holes I had made in the back of the radar eye with gel super glue. Once those set up, they were bomber. All that surface area with the threads and the glue filling the hole makes a great bond.
Going backwards: how did I locate the holes? When I figured out where I wanted the eye to hang on the dome, I traced it into place with a pencil. Then I figured out where the four screws should go. Then I drilled the dome first. Hold the radar eye back on the dome carefully lined up with the outlined location and you can mark the hole from the inside of the dome with a pencil. That way you get perfect alignment on a tricky placement. Here's the radar eye and the bolts from the inside:
It's just not possible to get the angle of the mounting posts exactly right and the curves make things difficult. So just use a larger bit for these holes through the domes and use a washer on the nuts on the back.
Inner and Outer Domes
Lots of work this week. I had been struggling with the fit on my R and J dome for a while. The odd thing was that the inner dome was too small. This made it fit with a gap when you slid it into the outer dome. So there were gaps in all the panel cutouts, and it made it impossible to get the inner dome to slide onto the ring that they sit on. I finally resolved to fix it by cutting the inner dome into two pieces. I took a deep breath, double checked my measurements and went at it with the dremel tool and a cutting wheel (I managed to burn the dremel tool up with this project). Here's the result:
You can get away with these cuts because the horizontal cut here is hidden on the solid middle section on the outer dome, and the vertical cut will line up with a wide section on the back of the outer dome that runs between the panels. These cuts solved the fit problem I was having entirely.
I have also been thinking about the best way to attach these domes together. I know the standard method is to glue them together. I have read that a lot of guys used silicone. I ran some tests and that stuff had almost no sticking power here. Again the gel type super glue was by far the best stuff to attach aluminum to aluminum (or anything else, for that matter.) But the glue attachment method is messy, risky, and inelegant. I tried a few other things and came up with this first:
That's a piece of 1/8" by 1.25" aluminum stock that I had bought for the foot strips (it worked great for those.) I cut it to length and then put a bend in it so it would match the curve of the inside of the dome. Then I drilled holes and screwed it to one side of the vertical cut in the inner dome. Remember that the the goal was to get the too small inner dome to fit snugly up into the outer. So I used this piece to add a little more than 1/8" in circumference to it and the fit was perfect. I was proud of that trickery.
Then after thinking about the glue problem, I realized that with the radar eye there was already some substantial mechanical fasteners attaching the inner dome to the outer. So I put them together and then drilled out counter sunk holes for more machine screws around the perimeter to attach the inner dome to the mounting ring.
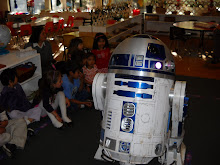
I put 8 of these around the bottom edge--high enough to be hidden by the blue dome panels when I put them it, and low enough to go into the inner lip on the mounting ring. The result was really secure and I was able to avoid glue. After I got all of these in and once I was sure that I had all the holes in the domes I needed, I went through and made sure all the counter sinks were deep enough to recess the screw head entirely (I don't want them pushing the outer dome up), and I ground down the slag that was sticking up inside and out from making the holes.
A few more points about cutting holes in the inner dome. I tried several methods including the ones that some club members like Chris Lee has on his blog. In the end, the hole for the holoprojectors was pretty easy. I had a 2.5" hole saw bit in my box:
And that worked just fine. The diameter of the holoprojectors I got from Frank Fesquet was about 2.6 inches. So once I used the hole saw, I finished up the edges and increased the diameter with a rounded edge file. I was surprised at how workable the aluminum was. I was able to get some clean, round holes with files and eyeballing it. Same procedure for the dome bump holes.
And here you can see the first results of taking the hole saw to the dome. The thing slops around a bit and makes a horrendous noise and the hole it leaves is rough. But readily cleaned up.
It's not necessary, especially with an opaque radar eye lens like I have, to cut a hole under the radar eye. But I've got it in the back of my mind that much later when I have all the basics done, I'm going to mount a wireless surveilance video camera inside the radar eye and have it feed to a monitor. Then you'll be able to look at the "R2 Cam" and see what he's seeing--mostly screaming kids intent on destroying him, I imagine. And if I'm clever I might even be able to get a servo mounted on the camera so it will pan up and down. That would be very cool, I think.
Tuesday, August 4, 2009
Body Assemblies Completed
Monday, August 3, 2009
Final Body and Leg Assemblies
Did some finishing touches on the body and legs. Spent a few days getting the battery box hoses mounted and attached.
And then I painted and mounted the battery box harnesses. I'm pretty dissatisfied with the paint job on them. I suck at painting, and using metallic paint is especially hard. Getting good clean results has been a constant battle. There's hardly been a piece on the whole thing that I haven't had to strip and repaint because of some problem or other. The solution, I think, is to ultimately replace these parts that I am trying to get to look like aluminum with paint with real aluminum parts. I didn't do that here because they are really costly. But I think I'll make up some aluminum coin returns at least, and then maybe replace other parts later. Most of the things that are bugging me though won't be very noticeable to others.
And I got the coin returns painted and installed:
I painted them silver first to get the faces in the right color. Then I masked the faces off and painted the base/body parts in blue. The results are ok, but not great.
Now that all of the major body pieces are more or less on--I'm thinking about the dome finally. I spent a bit of time last night sanding down the spin lines on the inner dome. And tonight I managed to get one of the holoprojectors installed. Pictures soon.
Subscribe to:
Posts (Atom)