Wednesday, October 28, 2009

R2 Visits Knox's Second Grade

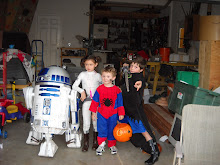
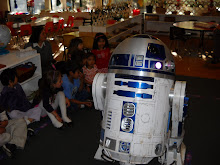
R2 visited Max's class today in preparation for Halloween. The kids were great, with only minor rioting. Here's some pictures and video:


Tuesday, October 20, 2009

Jango

Traded some R2 parts to another builder who's an expert helmet maker. He's done some meticulous restoration work on a cast of one of the original Jango Fett helmets and figured out a process for cold casting the reproductions. I've got plenty to do with the R2, but I am psyched about this helmet.


To the casual observer, the Jango Fett costume looks more or less like Boba Fett's but with different colors. But there are a lot of very interesting style differences. Jango's got a lot of very retro, almost art deco looking details, and that's combined with a definite Old West cowboy flair. He's also much tidier and cleaner than Boba. Dare I say he's even got some gay style going on? He's at least a metro-sexual. I'm digging him and the helmet, even if Attack of the Clones is the second weakest film of the 6. The Dented Helmet is the builder resource to go to for pictures and build details.

Friday, October 16, 2009

The Dome Lighting Project

So the project for the last few weeks has been to get the front and rear logic lighting systems built and installed. Currently, here's the plan.

I'm using a couple of these pic flasher kits from Carl's electronics:

Senna's PCB plans for front and rear logic systems

And I have some of the printed circuit boards that Mike Senna designed for the club.


And finally I have order a pile of LEDs from a distributor in China off of ebay. Mike Senna found these:

color shape MCD amount Price Ebay Number
Blue flat 6000 100 $8.00 110433484400
Red flat 5000 200 $17.00 120468254580


White flat 4000 100 $16.00 300320156284
Green flat 4000 50 $9.00 300320153056
Yellow flat 4000 50 $7.00 300320154213
Orange flat 4000 50 $7.00 300320153790

These are better than the package of LEDs from the Florida electronics company that has been supplying the club because they have a flat top. So when these are inserted in the bezel, the front will be more or less flush and will look more like the original fiber optic systems in R2 in the original film.

I ordered the bezels from James Com8 Maxxius on the club board.

The Pic flasher will supply current and a somewhat random flashing pattern through its 8 outputs. And Senna's PCBs have the 8 strings of lights scattered around on the board to maximize the randomness. So after a whole bunch of soldering the results should be good. I will update soon, however.

Thursday, October 15, 2009

R2LA 2009

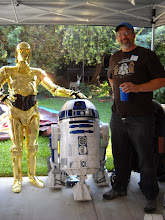
Got back from R2LA 2009 at Mike Senna's house on Sunday. Lots of builders there. About 20 droids. Lots of very smart design and problem solving ideas. A bunch of the blogs and threads on the club forum have pictures. One highlight is my R2 posing with a C3PO who showed up for the event.

Tuesday, October 6, 2009

Catching up: speaker installation.

A few weeks back I put the speakers in. Here's the run down. I had already built a mounting plate to attach the vent surrounds to from the inside that makes the surrounds stick out the requisite .25" from the skins on the front. That attaches with screws inside the frame. I picked up some speakers at Fry's. They're 12 volt car speakers, 3.5" across. Those were the smallest they had. They have a little tweeter that protrudes, so I needed a spacer between the surround mounting plate to hold them back a bit. So I cut this with my circle jig on the router:


I've got several ways to cut circles. If the radius is bigger than 9" or so, the circle jig on the bandsaw is best, but it requires a skinny blade to turn with the cut or you get drift. I also have an adjustable circle cutting plate for the router where you move the router. This rig is just a piece of plywood that my router is screwed to underneath. And then I put a pin--a cut off nail--into a hole at the radius I want to cut. It produces clean, near perfect circles, especially small ones. These holes fit the speakers well:


So the speaker screw into this plate, and the plate screws into the mounting plate for the vent surrounds, and that plate is screwed to the frame.

I also got a little kit from Carl's electronics a few weeks back for a stereo amplifier. I think the kit was $20 and it took 15 minutes to solder together. I am running a signal from the ipod to that amplifier now and then the signal from the amp goes to the speakers. The amp takes 5 watts that I am running off of a power distribution board. I had seen some droids that had puny sound systems and I didn't want mine to end not being heard. This system is plenty loud. I have to dial the Ipod way back.

I just ordered a little remote control unit for the ipod today from Amazon that will let me control the tracks. It's not quite the capability of some of the remote systems, but I think it will be fine for now. I'm still going to work out the kinks in the Picaxe/VMusic2 system, but the ipod tracks will work now.

Outing

Took him to Walnut Creek for my niece's birthday. She was stoked, but scared to get close:

Monday, October 5, 2009

MDF Horseshoes

I've been trying to get a little side project finished up in time for R2LA. R2's horseshoes (the assemblies on the outside of the shoulders) are one of the trickiest parts to build yourself. The options out there are aluminum, or a styrene laser cut pack with layers, or build it yourself. I did a pair with PVC that had potential, but some alignment issues and glue problems didn't work out. I got the idea to do them in MDF from Jamie McShan. The problem is all the little grooves on the inside and the recessed pockets. All are hard to cut precisely. If you build up the horseshoes with layers of material there are alignment problems and lots of work.

So I've been scheming for a long time about a way to do them with a single piece of MDF and some clever cuts with the router. Here's the results. These are good. They are better than the set that I built for my own droid. I don't know if there's a need for them, but I'm going to take them to R2LA and see if people are interested in them. If so, I think I can mass produce them quite a bit cheaper than the aluminum ones. The other advantage would be that I could offer mine frequently. The machine shop runs for aluminum horseshoes in the club are relatively rare. Check it:


My digital camera doesn't do well with super closeups, but you can tell here that the grooves are all really clean. This is the pay off for using a single piece of MDF (1" thick). I don't have to stack, glue, and line up 8 pieces. I'm using a router, the router table, and a 1/8" slot cutting bit with a big roller bearing on it that limits the depth to 1/8" deep. So once the router is set up, it's easy to just ream these around against the bearing and mill the groove out. In fact, it take's longer to set the router up than to actually do the cutting. One trick for efficiency that I want to pursue is building up several slot cutters with 1/8" spacers in between them, so I can do all the grooves with one pass through the router. But that will be a refinement of the process later.


Here's the backside. On this pass through the router, you run the piece all the way around. The result is the shim that holds the horseshoe out from the shoulder.


I've made a stack of these and I'll see if there's interest in LA. I think they will all sell immediately, or they will be ignored because people really want aluminum.

It's taken a bunch of development to get to where I can make these, so I hope that it won't be wasted. I think there are going to be some builders out there who are limited on space and shop tools for building stuff like this, and who don't want to spend all the money on aluminum.

The trick on these now is painting. The MDF soaks up a lot of primer, so that takes several passes and some light sanding with 320 grit, or so. Then the order of white and silver paint matters. It's better to paint these white, or at least paint the top faces and edges white. And then it's not too hard to go back and mask all the white off leaving the soon to be silver parts exposed. Then lots of light passes with Rustoleum metallic silver gave me some good results. But it takes patience to get a good coat of it down into all the grooves, the pockets, and around the shim.

Mounting can be done in the back of the recessed pockets. There's enough room to hide a screw that goes right into the shoulder, and then the shoulder buttons or the shoulder details cover the screw head up. You can see the results in some of my earlier posts. If I start selling these to the club, I'll put up an organized post about the whole process. Email me for more details about cutting them, if you're interested.

Friday, October 2, 2009

Dirtier!


I let the first round of weathering with the browns and reds sit for a few days and I thought about it. Don Bies, one of the droid builders and wranglers from Lucasfilm, says to avoid black for weathering in a tutorial he did at Celebration 3. I appreciate his point, but there's just no denying the sooty, black tone of the weathering in A New Hope. So I layered on some thinned out black acrylic tonight. I tried to get a bunch of runs and puddles to resemble some sort of mechanical fluid running out of R2s joints and fixtures. And I got a good drip going on the hole in the body in the back where I punched a screw driver through. We're going to play that off as battle damage/laser fire. I think I'm more content with the results. But I'll have to see how I feel about it in a few days. He's heavily weathered now, that's for sure.