Tuesday, September 29, 2009

Dirty!!!

I've been thinking about weathering for months now. Lots of R2 builders just can't bring themselves to wreck the paint job with a bunch of crud. And I can understand that. But I've always wanted him to be dirty like in A New Hope. It's just not right for R2 to be too clean. One of the interesting things that Lucas did with the first movie in the 70s was portray the droids and the technology and the exotic props as worn, used, and lived in. This in contrast to movies of the era like 2001, or Star Trek where the props and the ships are a focal point of the movie and they are put on a pedestal with the camera work and story line. Lucas wanted all the normal stuff of life to just be in the background, hence lots of cool tech and gadgets slip by in seconds on screen. Dirty droids are a central part of his vision. So R2 has to be covered in crud.

I got the Celebration 3 R2 Builders DVD from McMaster with the Don Bies weathering video and watched it carefully. Following Bies' advice, I got acrylics that would wash off in burnt umber, raw umber, burnt and raw sienna, and yellow ochre. Then I stippled, smeared, wiped, and scrubbed some of them--mostly the burnt sienna--all over him last night. With a damp cloth and a spray bottle, the paint comes off and you can get some nice irregular distributions and patterns. I also added some paint to the spray bottle to get it to run down the body. When the color gets down into the panels, they really stand out whereas without paint they all kind of blend in and the droid looks flat and featureless. Check it out. I started at the bottoms of the feet in the back just to get a feel for it and went slow. Then I built up my courage as I got satisfied with the look of it and moved towards the front. Important rule: When you're launching into a technique that you're new to, always start in the back or somewhere less visible.
But weathering turned out to be pretty forgiving, I think. I like the results, with an exception I'll mention below, and it was pretty easy to get a look that I liked. And as soon as some of the crud went on, you could just see the character of the droid come out. It was like it wasn't really R2 until he looked like he'd been through all kinds of rough, messy abuse.

Don Bies recommended against using any blacks for weathering. His claim was that a lot of fan stuff has black on it for weathering, but it looks too stark, or like it's trying too hard. I can understand that. So I stuck to the red and browns, and they're good. They definitely have a Tatooine look to them. But when you look at the first 20 minutes of A New Hope, there's just no mistaking the fact that R2 has a lot of greasy black smudges all over him. He's got mechanical weathering, not just dirt. So I got some black today and I'm going to layer on another course to get him darker. Another thing you can see once you watch the scenes just for the weathering is the different R2s that they used in the different scenes. That is, the weathering patterns are really different on them,and you can tell that it's a different model from scene to scene. You'd think they would have made a bigger effort at continuity. But I guess it took me almost 35 years to notice.

A lot of non-fans don't really understand why we'd want to dirty our hard work up like this, but now that I've done it, he looks a lot better.

First Public Outing

We took R2 to the Sacramento Sci-Fi and Horror convention last weekend and drove him around. When I was loading him into the car, a couple of things were immediately obvious to me. First, I need a way to safely load him into the back of the SUV by myself. And second, there's a lot of flex and movement where the legs attach to the shoulder hubs. So that needs to be fixed. More on the solutions later.

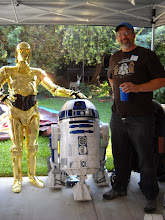
I wasn't prepared for the reaction at the con. People just mobbed us. I could hardly drive him around there were so many people wanting to see him, take pictures, and talk. It was pretty cool. He was a big hit. In fact, he sucked all the fans away from the autograph tables with the actor/celebrities. I forgot that he's a celebrity too. There must have been a hundred people who took their picture with him. Of note is this one with Tony Todd, who's done some cool work over the years as a Klingon, the Candy Man, etc.


And here's one with me and Max. I don't have a clue why that guy wanted to pose his Pokemon doll with the R2. Conventions bring out some strange ones:


I got to talk to the local 501st guys and will probably hook up with them now that R2 is mostly public ready.

Sunday, September 20, 2009

Scorched Picaxe Chip

The other project I've been working on is the sound system. I'm trying to use the M and A system M and A Sound System that uses the VMusic2 unit, and a Picaxe Microcontroller. I don't know anything about microcontrollers or programming these chips, but I thought this would be my excuse to learn. It's been challenging. I had a lot of trouble getting everything working from the tutorial, but I think I had a bad jump drive that I was using for the sounds. For a while all I could get the system to do was play a single R2 sound over and over. But I think I got the wiring sorted out and I replaced the jump drive.

In the tutorial, it says to skip outputs 3 and 4 on the Picaxe board and wire 0,1, 2, 5, and 6. I thought that 3 worked too so I hooked that up to the remote control receiver. Either that mistake or something else I did but don't see seems to have fried my Picaxe chip. The whole thing worked before my mixup with number 3, then after it was dead. And the program on my computer won't even recognize the chip now when I hook it up. So I cooked it somehow. I ordered another one and I'll try again. Here's the system so far:


The Picaxe chip is in the middle left of the board in the top of the picture. I've been trying to learn to solder through all of this, so I keep worrying that my poor learning attempts have shorted or bridged some connection that's not supposed to be connected. Just to be safe I ordered another board with the new chip. Just $18 total or so. Google Picaxe 18x. The software, as the tutorial says, is available online. I'll update this when I get in there and try to fix that part of the system this week. Hopefully I'll be able to secure all of these components to the back panel I added today and get it all organized.

Reorganized the Electrical System

When I first got all the parts, I hastily wired everything up and kind of stuck it inside just to see if I could get the droid running, and I had a bunch of battery issues to work out. So over the last couple of days, I've been reorganizing the electrical system. I managed to cannibalize the power switches (which I like) and the charging system out of the scooters and put them to work in the droid. I got some small hinges with removable pins and mounted this pvc panel inside the back door to mount everything one.


I'll be mounting a power distribution board on this panel and the sound system, which I'm working on. I think there will be enough room.

Here's a close up of the switches and the charging ports. Pretty cool:


I didn't know if I could get the chargers to work from the scooters. There's a box inside them with a bunch of circuitry that the charging and accelerator all run through. I didn't want any of that stuff from the scooter, I just wanted the switches and the ability to charge them. But after looking at it and thinking about it for a few days, I managed to hook it all up. I've got two banks of batteries, with two batteries in each. They are 12v. So I've got two pairs of them wired in series to make them 24v. Then I took both banks of 24v and ran them through a power switch and a charger port. Then on the other side of the switch, I put the power leads together to combine the banks. They are wired in parallel this way, so there's still 24 v, but more amp hours. That combined power line goes straight into the motor controllers for the foot drive and the dome drive. I'm running a 5v power line off of one of the motor controllers to the receiver. But I may change that when the distribution board is in there. Here's the backside--it looks messy, but it makes a lot more sense than the tangle I had before. I've gathered up different leads and routed them around the frame on the inside with wiring hooks.


Here's what I've come up with for the batteries. I may have to change it if I decide to switch batteries later. The batteries from the scooter turned out to be 2.75" wide, which is the inside width of the c channel I bought for the foot drives. So I cut some pieces of that, put little caps on the ends, and I ran a wire up over the top so the battery can't come out of the holder. Then I drilled holes in the ends of the battery brackets and screwed them down to the floor of the droid. I'd like to have a dowel or a threaded post coming up for this I think, but maybe later.


And here's the shot from above. You can kind of see the routing of wires around the frame. I left some slack in the wiring going to the back side of the door so that the door can open freely. I've tried to put connectors in the wires in some strategic places so that I can take parts or assemblies out if necessary.

The lighting system and the power distribution board, which I got from Dan Stutgen (spelling?) requires 12v. So I think I'll have to get another battery for all of that, or figure out how to step the 24v signal down to 12.

Next big steps will be getting the four lights in the dome all set up and wired to the slip ring. I need to install a deck in the bottom of the dome for the slip ring and possibly another power board. I'm thinking a lot about Chris James' designs on these parts.

Tuesday, September 15, 2009

More Driving Tests

I got over my apprehension and wired the batteries up for 24 volts. I was running at 12 (If you wire two 12 volts batteries in parallel, you get 12 volts but twice the run time, if you wire them in series you get twice the voltage.) My motor controllers are made to handle 24 volts. He's got a lot more power this way. In fact, when the batteries are fresh he goes too fast. And taking sharp turns I could tip him over. I'll have to watch that.

Here's some video in front of the house.

A few issues have come up in the driving around. I raised the front caster about 1/2" because it was riding too low on the carpet and I moved the caster a bit forward. But now you can see the footshell tipping up and shifting around. When I have him flipped over next, I'll have to shift that caster back under the leg and snug up the foot shell. I want a long wheel base, but shifting out away from the legs puts strain on the foot shells. Maybe I'll try two casters in the front foot shell. The problem with casters is that the movement is herky jerky when they are oriented one way and then you turn sharply another way. It takes a thrust and probably creates an amperage spike for the motors to get him moving from one position to the other. But short of having a steerable front wheel, I don't seen an alternative.

The dome is rattling a good bit. I've only got three screw mounting posts. I think I need rubber spacers or something in between to let it rest evenly. The inner ring on my dome hoop was welded crooked to start with and the wrong size, and it got bent around while I was working on the dome. I'll have to work on that.

I have also been looking at salvaging the charging and switch system out of the scooter chassis to use in the R2. I'd like to have an easy plug and play charging system, but I'm a bit over my head on the electronics right now. I'll figure it out in time.

Saturday, September 12, 2009

R/C Movement!

Before I had just directly wired the motors to a battery I was carrying behind the R2. Today I got the speed controllers, receiver, batteries, and transmitter all wired up. And to my shock, the whole thing worked with a minimum of tweaking. I bought the Syren 10 speed controller for the dome motor, and the Sabertooth (also from Dimension Engineering) dual channel speed controller for the motors. I had also ordered a VEX 6 channel transmitter R/C unit on Ebay, and a Multiplex receiver. The VEX unit comes with a receiver, but it seems to be proprietary and it goes only with their speed controller. I got the Multiplex receiver for super cheap, maybe $10, and I stuck the receiver crystal from the VEX receiver into it. I'm new to all of this stuff, but guys in the club had figured out, especially Jamie McShan, that the VEX crystal would work in the other brand receivers, but not the other way around. So I wired it all up, some of it rather temporarily to a short term component board, and I played around with the dip switches on the speed controllers a bit. I put the R2 up on blocks so his wheels could turn for testing. And it worked! I had a lot of apprehension, so I'm thrilled. Here's the mandatory R2-in-the-kitchen video:

Sunday, September 6, 2009

He's Moving!!

The foot drive system all went in as planned. Originally, I had decided to put the wheels in the front of the brackets and the motors in the back. My thinking was that I wanted to get the wheels as close as I could to being directly under the point of the leg, and I was trying to maneuver around stuff inside the foot shells like the nuts and backside of the knurled hose fittings. So I cut some big holes in my beautiful, flawless foot shells and battery boxes last night. I put the bracket in there without the motor and tried to project as well as I could where the motor needed to go. I sketched the hole on the inside of the foot shell, then I rough cut it out with a 2.5" hole saw. Then with some hacking and grinding to adjust the hole, the brackets with wheels and motors fit right down inside.

But once I got them all together I flipped it over to see how it all looked. I was recalling that Dan Baker had had trouble with his R2 doing wheelies when it took off because he had just one wheel on each leg. He added a little caster wheel in back to act like a wheelie bar to solve the problem. I was wondering if I was going to have to do the same thing. Sure enough, when I got him turned over, having the wheels in the front of the battery boxes puts them really close to the front wheel in the middle foot shell. That is, his wheel base was quite short. You don't think this when you look at pictures, but his weight is pretty high, and if the wheels are close, he's tippy.

So I looked at it and thought about it a bit. I could add a caster, but there wasn't much room in there for anything else. Then I thought, the brackets, the spacing, the mounting holes and everything are symmetrical, so why not just turn the brackets around by switching the right to left and left to right, and putting the wheels in the back of the outer foot shells to increase the wheel base and eliminate the wheelies. That would require cutting two more holes in the foot shells for the motors in the back instead of the front, but I'm getting pretty good at that now. The only issue was making sure that the cuts into the battery boxes were far enough back that they didn't cut into the recessed section in front where the harnesses sit. I did some measuring and it looked like I could get behind the battery harnesses, so I cut the new holes. That made the battery boxes look like hell on the inside, but it's all hidden by being tucked up against the foot shell.

And this tricked worked perfectly. The foot motor brackets fit right in reversed, and when I flipped him over to check the tipping problem he was very stable. So I didn't have to add casters.

Once those were in, I hooked them up to some power wires that I had run down through the legs yesterday. I couldn't resist, so I put a battery to the leads just to see him move. This video is a bit Blair Witch Project-y because my 7 year old was running the camera, but I'll be damned, he moves:

Thursday, September 3, 2009

Foot Drive System

While I'm waiting for a pile of parts to arrive, I've been working on the boxes in the feet for the motors and wheels. I bought a couple of Razor E150 scooters a while back at Walmart ($100 a piece). The kids have been riding them around the neighborhood, but I had to tear one of them apart and get the motor, wheel, and batteries out of it.

My foot shells are a tight fit. I built them from 1/4" plastic and there's not a lot of room to spare in there. So the dimensions for the foot drive have to be just so. I spent a frustrating day or two mocking up different designs and layouts with 1/8" MDF until I had a layout that would get it all in there.

Like lots of builders, there's not enough room in there for that motor and two wheels, so I have to go with one wheel inside. That has caused pivoting problems for some guys who have the foot shells attached by the single axle point like in the plans. But I built a little saddle for mine a while back (see an earlier post) and put a couple of threaded bolts into the bottom of the leg to attach the shell by. So I think I won't have the pivot problem.

I don't like the wheel in the scooter. It's too tall and skinny, and it seems like the sprocket is too far from the wheel. The wheel is about 1.5" by 5.75". So I found some caster wheels at Harbor Freight that are 5" by 2". That will give me more traction with the wider wheel and it will let the R2 ride down lower to the ground:


Then I unbolted the sprocket from the scooter wheel, drilled four holes in it, centered it on the new wheel and screwed it onto the rim/hub.


I was pretty worried about this when I was looking for new wheels. I didn't know if I could find one that had a hub that would work to mount the gear to, but this seems to be fine. In fact, this was the easiest part of this job.

I got $40 worth of aluminum at Blue Collar Supply (Sacramento) for building the boxes. I wanted to use rectangular stock tubing like Mike Senna and Vic Franco have been doing on their drive system (which looks like some excellent garage engineering). But to fit my foot shells, I'd need 3" by 4" rectangular tubing, which is a pretty exotic size. I don't want the drive box to stick down too far. So what I settled on, after looking around at all the readily available aluminum, was using some 3" by 1" channel and some 1/8" aluminum plate.


Then I cut out the trapezoid side pieces from the plate. Turns out that I didn't have a really effective way to cut these. The bandsaw had a thin blade on it that was drifting on the cut a lot, and putting an abrasive cutting wheel on my old table saw was noisy, dangerous, and slow. So I put a new blade in my hacksaw and saw them out with arm power. That sucked. My wrist and arm are still feeling it. But here are the results:


I got the pieces lined up, clamped them, double checked all my measurements, and cut the various holes. Notice the slot for the wheel axle to allow to tighten the chain. One advantage to this design over the boxed in version that Senna/Franco are doing is that I can get inside the box to work on stuff. You can see here though that I had to grind down a scallop out of the side wall of the channel. That's to make clearance for the gear and chain on the wheel. Not hard to put that in, but cutting the all four trapezoids in the Sacramento heat was not fun. Here are some shots with them bolted together and with the wheel and motor in.


I think it's going to work well. Notice the additional cross piece down in the corner. That's a 5/16" (or so) bolt --3.5" long I think, with a piece of 7/16" aluminum tubing cut to 3" for a sleeve. I'm also going to put sleeves on the bolts that hold the motor in. I replaced the bolts that were on the scooter motor with ones that are 1.5" to reach across. With the sleeves, the motor should be secure enough.

I hooked up the battery and ran these a bit. Getting the alignment just perfect will be important to make them run smoothly and more quietly. The motor itself is nearly silent, but when you get that chain and the sprocket going in the system, it can really scream. That's worrying me for when it's in the R2. I don't want the drive system to sound like a lawn mower. I've been tempted to order some belt drive motors and belts instead just to get the noise down. Maybe if some of you out there have the belt drives instead of the chain drives you can let me know if they run quieter.

But for now I have the chain motors and I'm going to try to make them work. I'm going to get the alignment very good, get everything secure, and maybe dampen some parts with some rubber tape and see if I can reduce the noise. A good way would be to get the whole drive box closed in and insulated with some kind of sound dampening material, but that'll have to be a later project.

Next I have some L channel 1.25" by 1.25" that I am going to cut and put on top of these to make a fitting that will slide onto the slot in the foot shells. I figure that will fortify the whole thing and make the feet more stable. More pictures then.